So, I may not have sewed much this weekend, but I did style my Rapunzel wig! It started with
this wig, which I got on ebay. It was basically a blonde wig (of a nice quality and color) that was braided into one large braid. However, it lacked all the detail that Rapunzel has on her head. So I unbraided the wig, and wound up using nearly two packs of a jumbo #24 kanekalon braid, and about 1.5 packs of a silky #613 braid. (Of course, I bought a ton extra, so now I have three unused #24 blonde braids, if anyone is interested in purchasing them off me!) I wound up having to go to three different hair stores to find them. Thank goodness we were down in the Federal Way area anyway on Saturday! Neither braid color was an exact match, but by mixing them all together, I think it works okay.
The first thing I did was straighten the two kanekalon braids, since they have that weird frizzy kinkiness in them. I was really pleased to see that it easily straightened out with my flat iron on its lowest 300 degree heat setting.
I attempted to make a weft of the #613 to tuck up into a french braid on the right side of the wig. Most of it wound up falling out, though. Note to self (or others) - do not attempt to french braid an app 50" wig. You will probably get very tangled and very frustrated (like I did). Although it looks rather messy, I decided to keep the french braid in (I'm sure it would have been just as bad to attempt to undo it) and do a regular braid on the other side.
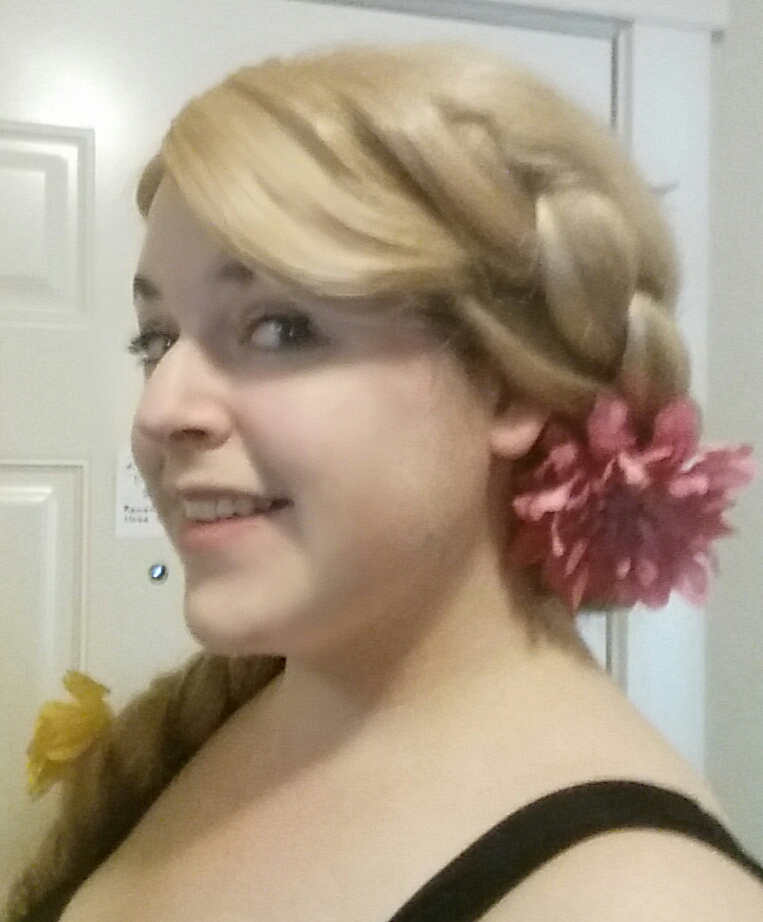
First, though, I had to do the bang swoop. I was hoping to get it to stand up a bit more than it did, but I think it gives the right overall effect. Unfortunately, I wasn't really thinking about the swoop when I ordered the wig, because this wig has a fixed center part, and only has a skin top underneath the part section. Luckily, I was able to pull some hair over from the other side and make it work. I hairsprayed the top and the underneath side, and then blow-dryed it on high heat, but low air until it dried, keeping my fingers underneath to keep the shape. I think I did that about 4 or 5 times until it got the shape I was liking. I pinned the bottom into place underneath the layers of hair I was going to be using for braiding.
For the braid on the other side, I took half of one of the #24s, separated it into three pieces, and braided it into the wig, attempting to blend the colors as I went. It made a nice big puffy braid which is quite pretty, and I pulled a couple pieces from the rest of the wig to help it curve around the back of the neck to the other side.
Then I basically tied those two braids into a loose knot, and used a claw clip to fix it in place. There are three claw clips total in the wig. I was hoping to be able to use bobby pins, but the hair is too thick and heavy, so it just pops the bobby pins right back out. Anyone have any suggestions? Otherwise I'm just going to hide the claw clips with flowers.
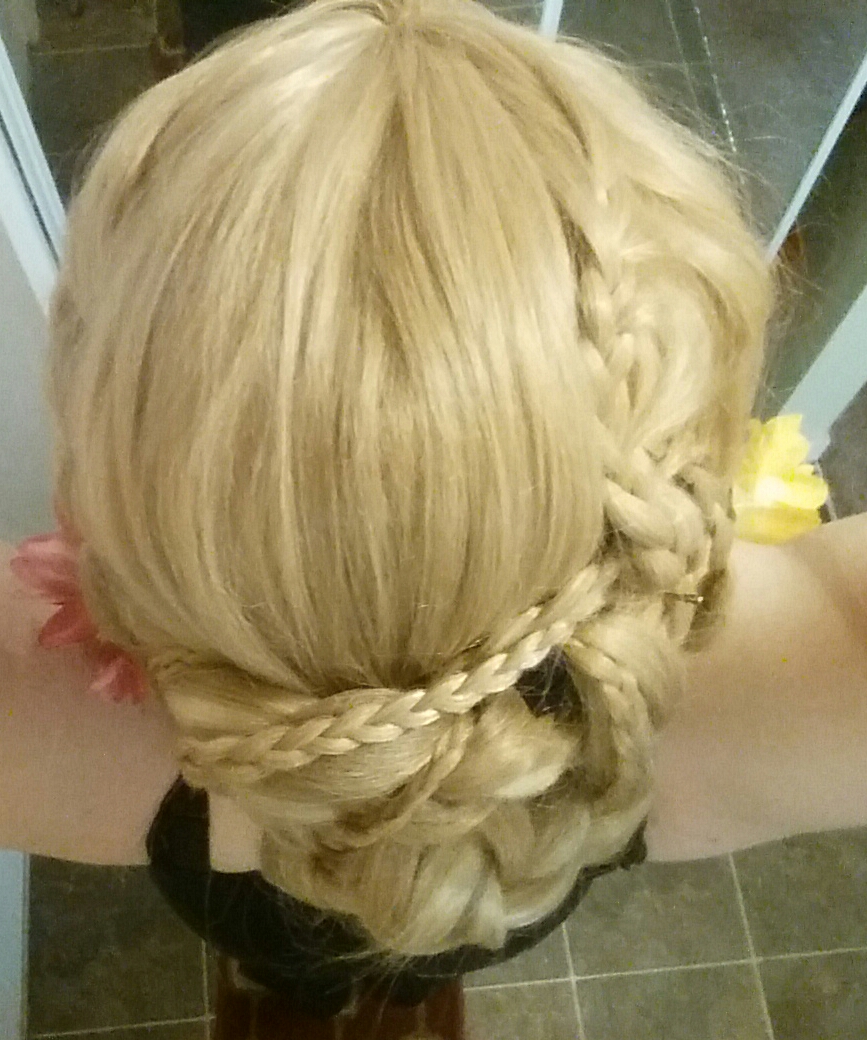
I did do another small french braid alongside the first french braid, but I only picked up three or four pieces into it before it met up with the other braids. The wig came with two tiny braids already done at the base of the neck, and I added two more, which I looped around the larger braids, and then incorporated into the big braid. Once the two larger braids met, I braided them together, weaving them back around to the other side of the head. I found, in braiding the larger braids, that it was very helpful to section off each piece of the braid with small plastic hair ties, to combat the wig's urge to tangle.
Once I got to the other side, I added in my other #24 braid and my #613 braid, holding them each by the end (instead of folded at the middle like they normally come). I ponytailed each one separately, and then rubberbanded them again to about half of the wig hair that was hanging down. I separated them all into three pieces, so that each piece was equal parts wig, #24, and #613 in an attempt to blend the colors. I also tried to make sure that the tiny braids were fairly evenly distributed. Then I started the big braid. It was very difficult to do because it was so long! I braided until I got to the end of the wig hair (which was quite a bit shorter, at this point) and then rubberbanded. One of the other alligator clips is also holding the top ends of these two incorporated pieces into place.
I didn't do pin curls when I tried it on yesterday, but I will definitely be doing them when I wear it for real. I'm going to try wearing it all day on the day of my Halloween party, so that I will hopefully be able to tell if I can manage the weight when we go to Disney World. At this point, I still need to add all the flowers, and I'm also going to try to rig some sort of snap set up to attach the top of the long braid to my shoulder so that it is not so heavy.
And if you made it through all that, here's a few pictures!